
As many of our followers know, we built our own bimini back in June of 2009. The yellow Sunbrella has kind of been a trademark for Beach House wherever we go. But the Florida sunshine and the cold damp weather in the Chesapeake has taken a toll in just a few short years. We usually get at least five years out of a bimini, but not this time. Weighing the pros and cons of building another fabric bimini or finding an alternative has suddenly come to the top of the to-do list. This is another of those unexpected repairs that we thought we would deal with in another couple of years. But it is a boat after all.

It wasn't so much that the fabric has deteriorated, it is a bit thin, but more about the staining that has appeared. At first we thought it was mold or mildew, but the stains were not the usual dark color of mildew. Instead they were a very bright shade of green. No amount of soap or cleaners would remove it and it was getting worse as time went by. The heavy spring pollen is a possible suspect, especially since it seems that the stains collect and soak to the underside with each rain. We loved our hardtop on our sailboat, Sea Trek, and seriously considered a hardtop for the flybridge. A major concern was the added weight a fiberglass top would present that high off of the deck. After some research and getting some feedback, we started looking at a product from Hard-To-Top in Michigan. The hardtop panels are a lightweight but strong polycarbonate and the frame is anodized aluminum, making it strong but not heavy. From the very beginning, Al Miller, Owner, and his crew were extremely helpful through the entire process.

The first step is to go online at the Hard-To-Top website and download a measuring sheet. Follow the instructions and measure carefully according to the directions. Once the measuring sheet is completed, go to the Contact Us page on the website and request a quote. We were very surprised to find the quote was not far from what it would cost to have someone build us a fabric bimini.

Once we were satisfied with the cost, Chris from Hard-To-Top emailed us a layout of the top for final approval. We made a couple of minor adjustments because of the irregular shape of our bimini frame and that was it. The Hard-To-Top unit attaches directly to our existing bimini frame, a feature we very much liked. Our last hardtop required us to have a separate aluminum frame built, which can be expensive. In short order, we received an email that the top was on its way. The shipping carton is very large because of the size of our top so it had to be shipped on a truck rather than UPS or FedEx. Once it arrived, we excitedly unpacked everything and began to lay out our plan for installation. The installation instructions can be downloaded in advance from the Hard-To-Top website.

All of the hardware and parts are neatly packaged for our particular installation requirements. The only tools we needed were an electric drill, tape measure, screwdriver, a 10-24 drill bit and tap, a 1/4-inch drill bit, some adjustable clamps, a ratchet and socket to install the stainless clamps and a hex wrench. We also used a piece of line (more later) to hold the panels in place so the breeze wouldn't send them flying. Susan and I estimated that we could easily complete the installation in one day, if the weather would allow it.

The polycarbonate panels come partially assembled with the aluminum channels (called E-8 in the instructions) attached on each side. The panels also have a protective plastic covering that needs to be removed before the panels are in place. The protective covering should not be left on the panels in the sun, for any period of time, or it may be difficult to remove.

Our installation required one panel to be centered on the bimini frame. Leaving the protective plastic on the underside of the panel in place, we marked the panel at the center on both ends very near to where they would sit on the front and back bimini frame. This would not mark up the finished panels. We did remove the protective plastic on the top of the panel.

Our next step was to level all of the bows - we have five - of the bimini frame to carefully mark the center of the front and back bows. We tied a piece of string tightly to the front and rear bows and used the string to align and level the others.

Once we were satisfied that everything was marked for center and as level as possible, we checked it all again just to be sure.

Susan and I easily slid the first panel in place and lined up our center marks. The panels come pre-marked, center, port 1, port 2, etc. To find the center of the bows we used a piece of flat stock taped to the bows, marked the center and used a carpenters square to find the center of the bow. This gave us the best measurement, since this is critical to getting everything straight and square with the bimini frame. Once the first panel was in place, we slid the next panel over the bows and lined it up, keeping everything centered.

The day was turning a little breezy at this point and since our top was 8 feet wide and 10 feet long, the breeze wanted to blow the panels away. That's where our adjustable clamps and piece of line came in handy. We used the adjustable clamps to gently hold one side of the center panel in place. The piece of line was used to keep the adjoining panel just snug enough so that we could start installing the stainless clamps that would hold everything in place. Before installing the adjoining panel, we applied a thin bead of the supplied caulk to entire length of the inside corner of the aluminum (E-8) extrusions.

With the hole in the supplied stainless steel clamps in the exact location on the bow where they will be installed, we used a felt tip marker to mark the location of the hole we would drill for the fasteners. It's very important that the flange on the top side of the panel is pointing toward the outside edge of the top. It is also very important that the 1/4-inch hole is drilled through that flange, to hold it all together.

We also made sure that everything, including the polycarbonate sheets, were tight together. The hole needs to go through the aluminum and polycarbonate. The SS clamps were installed on the front and back bows and the center panel first. Once each end was clamped, we installed them on all of the other bows.

For us, probably the hardest part of the entire installation was getting the fastener nuts on the stainless clamps. We found a little assist from a pair of channel locks made the process a bit easier. The fasteners have a hex head on the bolt and a locking nut to keep them from coming loose. Once the fastener was started, we used a ratchet to tighten everything down. We were careful not to overtighten and crush the aluminum (E-8) extrusions.

We completed one side of the first center panel, and with all of those bows clamped, installed the next adjoining section. Once we had two lengths of the E-8 extrusions clamped, we were a little more comfortable with the breeze picking up. We still used the adjustable clamps to hold down the end panels until we had the front and rear stainless clamps installed.

We repeated all of these steps working out from the center to the edges of the frame. As each panel was completely installed, the top was looking better and better and we were feeling good about our decision. We were surprised at the ease that everything was going into place and at how quickly the entire process was going. We had allotted ourselves the entire weekend for the project but it was obvious it was only going to take us a day.

Any time I am installing stainless steel fasteners into aluminum, I coat the threads of the fasteners with a product called Tef-Gel. There are other similar products, but I much prefer the Tef-Gel and have been using it for years. In a boating environment, corrosion between stainless fasteners and aluminum can happen very quickly and eventually weld the fastener to the aluminum, making removal almost impossible and includes the potential for failure. The Tef-Gel inserts itself as a barrier to prevent the corrosion and makes removal easy. All of the fasteners in the hardtop received this treatment.

On the outside panels we found it easier to remove the extrusions (E-8) from the panels and install the clamps, then slide the panels back in place. The Hard-To-Top is designed with an overhang, and trying to install the SS clamps hanging out over the edge was a bit much. By removing the panel, it made this part easier and faster. The fasteners don't go through the polycarbonate panel on the outside pieces.

Through the entire process, we used our rope clamp to keep the panels snug together being careful not to overtighten it. Our top required the center panel, two adjoining panels and two smaller outside panels. The two small outside panels were installed last.

We removed the protective plastic covering on the underside before we put the panel in place and installed the stainless clamps. The topside covering was removed as soon as each panel was installed. This kept us from scratching the surface as we slid new sections in place.

The smaller outside panels were put in place. These panels were tapered to allow for the shape of the top being wider in the back than the front, and the corners are rounded to fit the final frame.


The frame consists of four corner pieces - two bowed sections for the front and back and the side extrusions.
The 90-degree corners have pre-drilled and tapped threads on two ends to allow the front and rear bows (HTE-1) to be slid into the corners and held in place for an exact fit. The two corners attached to the arched ends are put in place and can be adjusted if needed. The crew at Hard-To-Top did such a great job that the fit was perfect. We installed the back end first and with that section in place, slid the side sections (HTE-2) into the two corners. This part is where an extra set of hands really helps. Doing the install in the slip makes you very conscious that one misstep means a part going overboard.

The side extrusions (HTE-2) on our top are about 9 feet long. The only real adjustments we had to do were to be sure that the flat portion of the ends and side were 90 degrees to the polycarbonate panels. Loosening the set screws in the corners and a slight twist assures that everything is in the proper position.

The final step is to remove the set screws one at a time and drill and tap for the 10-24 screws. Then reinstall the screws using the Tef-Gel on the threads. Alignment is important to be sure that the hole drilled and tapped will go into the side and end extrusions. We did this for all of the screws on each end of the 90 degree corners.

Once everything has been drilled, tapped and secured, the hardtop was looking great and we were feeling good about how it looked. The strength of the structure is pretty impressive as well.

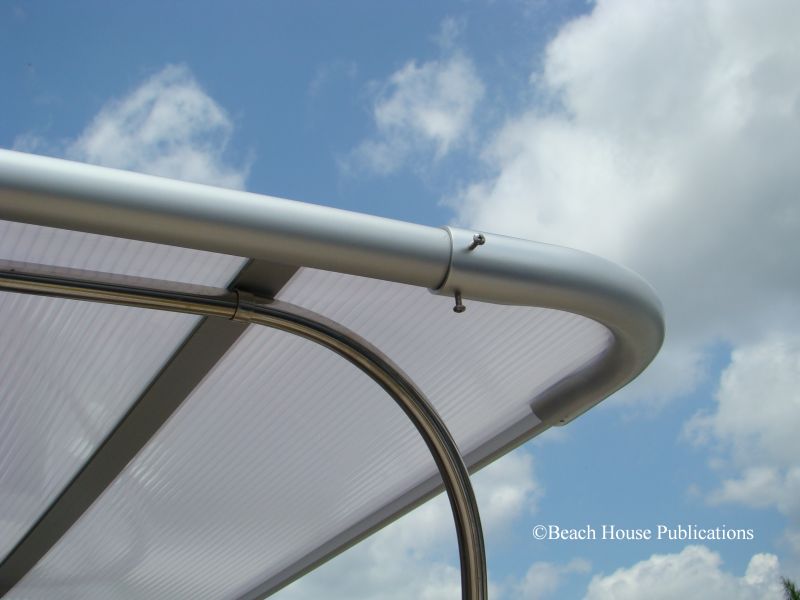
Our finished top will have a 3-inch overhang all around. The sides will actually overhang the entire width of the flybridge by 3 inches to allow water to off.

With everything in place to this point, we could take a break and stand back to admire our handy work. The top fit exactly as we expected and planned. We were almost finished, but there was one more small step before completion.

There is a small L bracket called a "3/4 cap" that needs to be attached to the E-8 channels and the end bows (HTE-1). The bracket is attached to the front and back end of each E-8 channels and the bottom edge of the front and back bow by marking them in place.

Next, the marks need to be drilled and tapping for a 10-24 fasteners and screwed in place. This adds more security to help keep everything together in adverse weather conditions.

Once these last pieces of the puzzle are put in place, the installation is complete. It's amazing how simple and easy the entire process went.

Needless to say, we were carefully watched by several folks in the marina as the day progressed. Everyone was impressed at how quickly we finished the project and more impressed with the finished results. We fully expect the hardtop to last for many more years than any fabric cover would have, and in the long run actually save us money by not having the constant replacement costs. We also like the ease of maintenance, only have to do a wash down when we do the rest of the boat. One concern was the inability to remove the top in storm conditions. After we finished the installation, we now feel that as long as the original bimini frame is well-secured, the top will not be an issue. We especially like the way the top will provide shade but still allow light through. For anyone considering a replacement for a fabric bimini, we highly recommend you look at Hard-To-Top. We're not sure yet whether we will add side curtains in the future or just leave the flybridge open.


That's a sweet system. Thanks for posting. Great tutorial.
ReplyDeleteRick
Thanks Rick. The longer it's up there the better we're liking it. Chuck
DeleteLooks good but very different from the pics on TF.Looks like a really good product.
ReplyDeleteThanks Ben and you are correct that it looks very different. Now I need to update the header on the blog and my avatars that are all over the web. My problem is that I can't get a good shot in the slip right now. We need to get it out on the water and I can't do that for a while. Chuck
DeleteUse a drone. that way you can 360 and over head the shots as well as flying down the edges.
DeleteNick /SC Cavalier IOH marina Sav Ga
Our sail boat has a conventional fully enclosed cockpit, the canvass has passed its used by date and I'm thinking of replacing the top canvass with a solid structure and then attaching new sides, and spray hood to the solid 'roof'.
ReplyDeleteHas anyone done this before - what where the problems and would you do it again - knowing what you do now?
Thanks
Gregg "Luna" New Bern
Gregg, we put a hardtop with a windsheild and side curtains on our sailboat, Sea Trek. You can see photos of how it looks on our other blog, http://sea-trek.blogspot.com . It was one of the best modifications we made. Chuck
Deletewere thinking of getting the hard to top for our cat and are just wondering what you think of it now, 5 years later? leaks? cracks or fading? we really enjoyed your article.
ReplyDeletethanx,
nathan and wendy
s/v/ whistling cay
Nathan and Wendy, It has only been a little over a year since we installed the top but we have covered thousands of miles since then. We feel that the hardtop was one of the best modifications we have made so far. No problems with it whatsoever and it has exceeded our expectations. It's been up in winds of excess of 65 knots and no problem. I hope we don't ever see more than that. We still highly recommend Hard-To Top. Good luck. Chuck
DeleteIn the process of installing one on "Bucket List". Referring to your pictures a lot. We have 4 - 2ft panels and 2 - 12". The channels in the polycarbonate are just wide enough to slide a 12v led tape into. I have 3 colors, red, blue and white. I got the keder rails for canvass. Hope they go up as easy.
ReplyDeleteThat sounds like a great idea and addition. I would bet it looks fantastic. The Keder system is easy to install.
DeleteWe sail in Florida full time and the sun is intense in the summer. Translucent scares me, how much heat and what is the quality of the shade on this top?
ReplyDeleteHarold, We have been based out of Florida for 20 years now and cruise the Bahamas often. If you have read the blog, you will see that. The hard top is the best modification we have made. Virtually no heat generated from the top and it creates lots of shade but there is still plenty more light than traditional canvas tops. We would never consider going back. Chuck
DeleteAre you still happy with this product?
ReplyDeleteYes. We consider it one of the best modifications we did. Chuck
Delete